
How Rendering Works
This page explains the rendering rules of EpoCanvas Docs in full: what processing steps a Markdown file goes through, what each piece of syntax renders into, and which syntax is not supported. Read it once before writing documents and you will avoid the vast majority of formatting problems.
The Rendering Pipeline: from .md File to Live Page
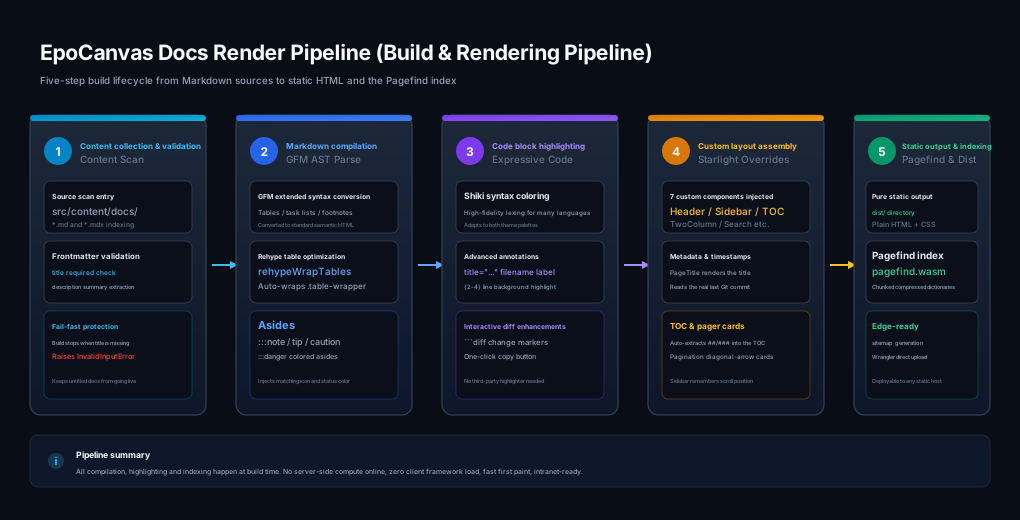
Figure: the 5-step Markdown rendering pipeline. The steps run in order at build time; the build output is pure static files with no runtime framework overhead in the client.
A Markdown file goes through the following five steps between being saved and being read by a reader:
- Content collection: when Astro starts or builds, it scans the
src/content/docs/directory, registers every.md/.mdxfile as a content entry, and validates the Frontmatter (a missingtitlefails the build immediately). - Markdown compilation: the body text is converted to HTML by the Markdown compiler (with GFM extensions). Extended syntax such as tables, task lists, and strikethrough takes effect at this step.
- Code block highlighting: all code fences are handed to Expressive Code, which produces code blocks with syntax highlighting, a title bar, line numbers, and a copy button.
- Site layout applied: the compiled HTML is placed into the Starlight page skeleton — the header, left sidebar, and right-hand on-this-page outline are all rendered by the custom components under
src/components/starlight/. - Index and static files generated: during
pnpm run build, Pagefind walks every output page and extracts the full-text index; the pure HTML in the finaldist/directory can be hosted on any static server.
Frontmatter Rules
titleis required; if missing, the build fails withInvalidInputError;descriptionis recommended; it appears in search engine results and share cards;- The Frontmatter must be a valid YAML block at the very top of the file, including both sets of three dashes.
Heading Rules
| Rule | Explanation |
|---|---|
Do not write a level-1 heading # in the body | The title from Frontmatter is already rendered as the page’s main heading; adding # in the body produces two main headings |
Start the body with level-2 headings ## | ## and ### headings automatically appear in the right-hand “On this page” outline |
#### and deeper do not enter the outline | Deeper levels are rendered only as body styles |
| Heading text becomes an anchor | For a Chinese heading the anchor is the Chinese text itself, e.g. #标题规则 |
Aside Rules (Admonitions)
Asides use Starlight’s triple-colon syntax and support 4 types:
:::noteSupplementary information.:::
:::tipA small trick that improves efficiency.:::
:::cautionA risk to watch out for or an operation that is easy to get wrong.:::
:::dangerA high-severity warning involving data loss or irreversible operations.:::
You can also add a custom title after the type: :::tip[Speed Up Installation].
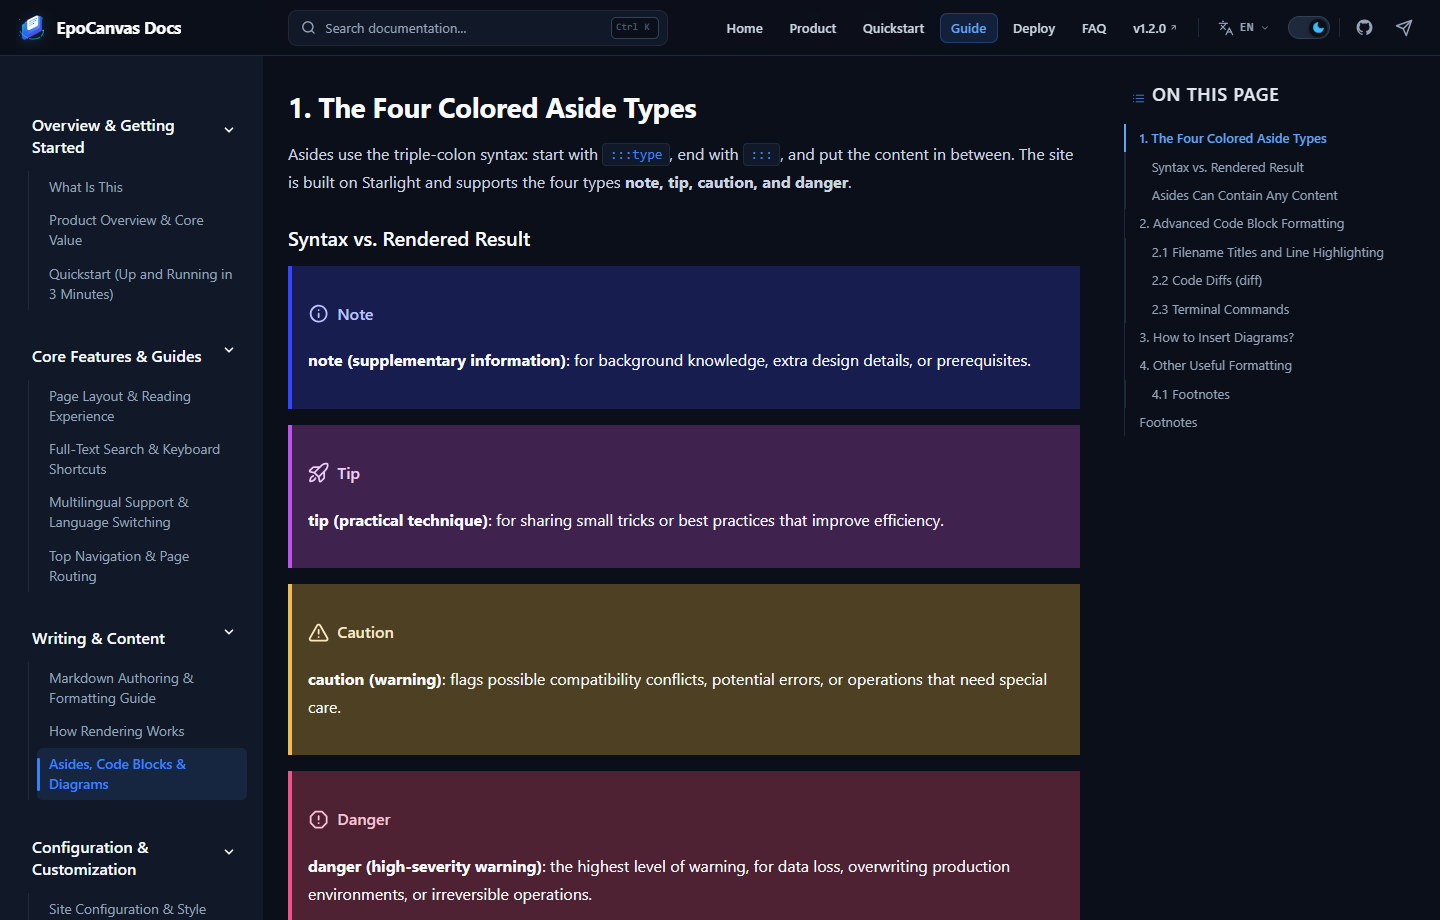
Figure: how the four aside types actually look when written with the syntax above, taken from the Asides, Code Blocks & Diagrams page.
Code Block Rules
Code fences (triple backticks) are rendered by Expressive Code and support the following annotations (written after the language tag on the first line):
| Annotation | Effect | Example |
|---|---|---|
| Language tag | Chooses the syntax highlighting scheme | ```ts |
title="..." | Shows a filename title bar | ```ts title=“src/config/site.ts” |
{2} / {2-4} | Highlights the given lines | ```ts {2} |
lang="diff" or diff | Shows added/removed lines in red/green | ```diff |
Terminal languages such as bash / sh | Rendered with a terminal-style frame | ```bash |
Every code block automatically gets a one-click copy button, and code text is included in the Pagefind search index, so readers can search directly for keywords in code.
Image Rules
- Store images in
public/images/canvas/and reference them with absolute paths: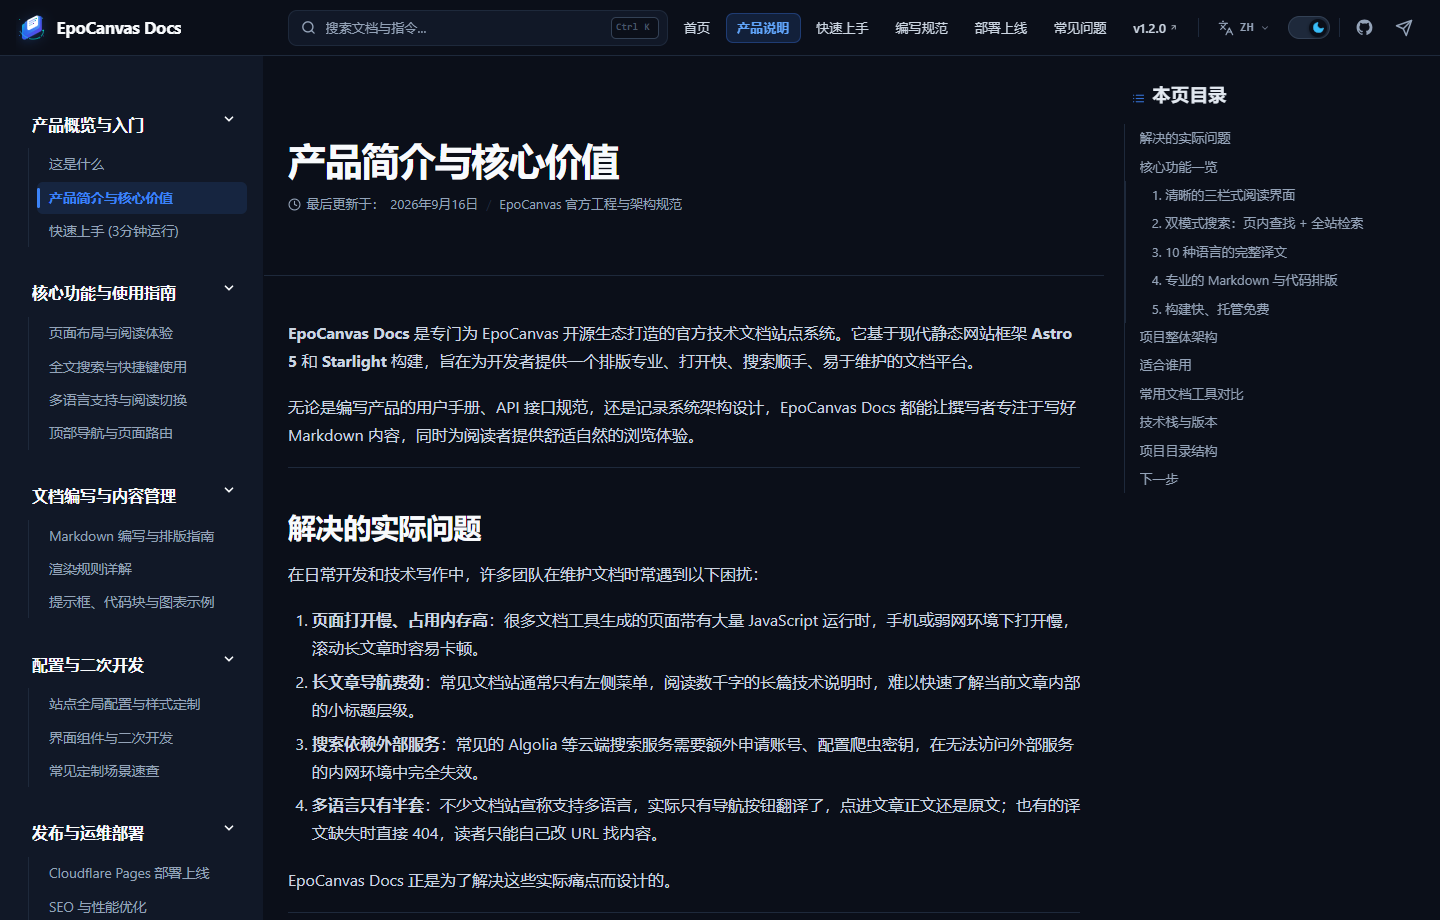; - Use
.svgvector format for architecture and flow diagrams, and compressed.pngfor UI screenshots; - The description text is required: it is the alt text shown when the image fails to load and the basis for accessibility;
- The current version has no built-in Mermaid diagram rendering: a
```mermaidfence is displayed as an ordinary code block showing the source. When you need a flow diagram, export an SVG from a tool such as mermaid.live first, then insert it as an image.
Link Rules
- Internal links: use full paths that start and end with
/, such as/canvas/deployment/. After a documentation path changes, register a redirect for the old path in theredirectstable inastro.config.mjs; - Anchor links:
/canvas/rendering/#code-block-rulesjumps straight to a section on this page; - External links: just write the full URL; the text is shown in the theme color in the body.
Other Rendering Behavior
| Syntax | Rendered result |
|---|---|
**bold**, *italic*, ~~strikethrough~~ | The corresponding text styles |
inline code | Monospace pill in the theme color |
| Ctrl+K notation | Keycap-style key badge |
| GFM tables | Bordered data tables with hover highlighting |
- [x] task lists | Visual checkboxes (disabled state) |
[^name] footnotes | Superscript number in the body + footnote list at the bottom of the page, with clickable jumps both ways |
Markdown blockquote > | Theme-colored vertical bar on the left + light background |
Horizontal rule --- | Thin divider spanning the body area |